
PPR pipe installation is a heat-fusion job, not a glue-and-thread job. You melt the outside of the pipe and the inside of the fitting on a heated die at about 260°C, push them together straight, and hold them still while they cool into one solid piece of polypropylene. Done right, the joint is as strong as the pipe wall and rated to last 50 years at its pressure class. Done wrong, it either weeps under pressure or blocks the bore, and by the time you find out the wall is already closed.
This guide walks the socket-fusion sequence step by step, gives a typical heating-and-cooling time table by diameter, and flags the four mistakes that cause almost every leaking PPR joint. If you want the full material and pressure-class background before you start, read the PPR pipe guide covering properties, installation and selection. Everything here assumes plain PPR or fiber-composite PPR joined by socket heat fusion, the standard method under ISO 15874.
Key Takeaways
- Socket fusion melts pipe and fitting at ~260°C so they cool into one part — no glue, thread or gasket.
- Typical heating time runs from ~5 seconds at DN20 to ~24 seconds at DN63; always follow your fusion tool’s own chart.
- Push the joint straight together — never twist. Twisting shears the molten layer and creates a weak seam.
- Plain PPR expands ~0.15 mm per metre per °C; a 4 m run heated 50°C grows about 30 mm, so plan for it.
- Under-heating causes cold joints; over-heating collapses the bore. Both fail. Time and temperature matter.
- Pressure-test every run before you close a wall or floor — finding a leak after tiling is expensive.
What You Need and Why Socket Fusion Works
Socket heat fusion works because PP-R (polypropylene random copolymer) softens and melts around 150°C. The fusion tool heats a matched pair of dies to about 260°C. You slide the pipe end into one die and the fitting socket over the other at the same time. The heat melts a thin layer on both surfaces. When you push the two melted faces together and let them cool, the polymer chains knit across the boundary and the joint becomes a single continuous piece of material. There is no adhesive and no mechanical seal to age or leak — the pipe and fitting are literally welded into one.
Before you make a single joint, lay out the kit. Skipping any one of these tools is where beginners cut corners and where joints go wrong.
- Fusion welding machine (socket welder): a heater plate or bar with a thermostat, usually set to 260°C. Let it reach temperature and hold there before the first joint.
- Heating dies (male + female pair): one size pair per pipe diameter — DN20, DN25, DN32 and so on. The dies must be PTFE-coated and clean; a scratched or resin-caked die heats unevenly.
- Pipe cutter or shear: a ratchet pipe shear or rotary cutter that gives a square, clean cut with no crush and no burr.
- Chamfer tool / deburrer: puts a small bevel on the pipe end so it enters the melted socket without scraping molten material back off.
- Marker and tape measure: to mark insertion depth and rotational alignment on the pipe before you heat.
- Heat-resistant gloves and a clean rag: the dies and freshly fused joint are hot enough to burn. Wipe pipe and fitting clean of dust, grease and water first — contamination ruins fusion.
Socket Fusion Step by Step
This is the core of PPR welding. Work through it in order. Do not skip the marking step and do not rush the cooling — those two shortcuts cause most field failures.
Step 1 — Cut the pipe square
Cut the pipe to length with a shear or rotary cutter so the end is perpendicular to the pipe axis. An angled cut leaves part of the pipe end short of the die, so only part of the circumference melts and fuses. Chamfer or deburr the cut edge lightly, then wipe the pipe end and the fitting socket clean and dry. Dust, oil or water on either surface stops the polymer from knitting.
Step 2 — Mark the insertion depth
Push the pipe against the unheated socket to gauge how deep it seats, then mark that depth on the pipe with your marker. This mark tells you exactly how far the pipe should enter the fitting after heating — no more, no less. Push past the mark and you can collapse or block the bore; stop short and the fusion zone is too shallow to hold pressure. Mark a short alignment line too if the fitting orientation matters.
Step 3 — Heat pipe and fitting together on the die
With the tool at 260°C, push the fitting socket onto the female die and the pipe end into the male die at the same time, both to full depth, and start counting. Heat both parts together for the time called out for that diameter (see the table below). Do not rotate the parts on the die. When the time is up, pull both off the die at once without twisting.
Step 4 — Push straight together, WITHOUT twisting
Immediately push the pipe straight into the fitting up to your depth mark, in one smooth motion along the axis. Do not twist, do not screw it in. The melted layer is soft and directional; rotating the parts smears and shears that layer instead of fusing it, which is a classic cause of a weak, leaking joint. A small even bead of melted material should push up around the mouth of the fitting — that tells you both faces melted and met.
Step 5 — Hold, then let it cool undisturbed
Hold the joint firm and dead straight for a few seconds so it cannot move while it sets, then set it down and leave it alone for the full cooling time. Do not pressurise, bend, hang or wipe the joint while it cools, and never cool it with water to speed things up — forced cooling locks in stress and can crack the weld. The joint reaches full strength only after it has cooled all the way through.
Heating and Cooling Time by Diameter
Bigger pipe has a thicker wall, so it needs more time under the die to melt and more time to cool through. The values below are typical, approximate figures for socket fusion at 260°C in normal ambient conditions. Treat them as a starting point only: always follow the chart printed on your fusion tool and adjust for cold or hot weather. In cold conditions parts melt and cool slower; in hot weather the joint stays soft longer. This PPR fusion time chart is a reference, not a substitute for the machine’s own rating.
| Pipe size (DN) | Approx. heating time | Approx. cooling / fixing time |
|---|---|---|
| DN20 | ~5 seconds | ~2 minutes |
| DN25 | ~7 seconds | ~2 minutes |
| DN32 | ~8 seconds | ~4 minutes |
| DN40 | ~12 seconds | ~4 minutes |
| DN50 | ~18 seconds | ~4–6 minutes |
| DN63 | ~24 seconds | ~6 minutes or more |
The heating temperature stays the same across sizes — the PPR welding temperature is about 260°C for every diameter. Only the time changes. Two numbers matter for each joint: the few seconds of heating, and the longer cooling window before the joint can take load. The “fixing time” in the last column is when the joint is set enough to move gently; full cure and pressure readiness take longer still, especially on the larger sizes.
Handling Thermal Expansion on Long Hot Runs
PPR moves when it heats up, and on long hot-water lines that movement is enough to matter. Plain PPR expands about 0.15 mm for every metre of pipe per degree Celsius of temperature rise. Run the numbers on a real hot run: a 4-metre straight length heated 50°C above install temperature grows roughly 30 mm (4 m × 50°C × 0.15 mm = 30 mm). Pin that pipe rigidly at both ends with no room to move, and 30 mm of growth has nowhere to go but into the pipe as bowing stress or into the joints as shear.
You have three practical ways to absorb that movement, and good installs often combine them:
- Expansion loops or offset legs: a U-loop or a change of direction lets the pipe flex sideways instead of pushing on fixed points. Add one on long straight hot runs so growth is taken up by the loop.
- Correct clip spacing with sliding clips: support the pipe often enough to stop sag, but use sliding (guide) clips on the run so it can move lengthwise, with fixed anchor points only where you want to control the direction of expansion. Do not clamp a hot run tight everywhere — that traps the stress.
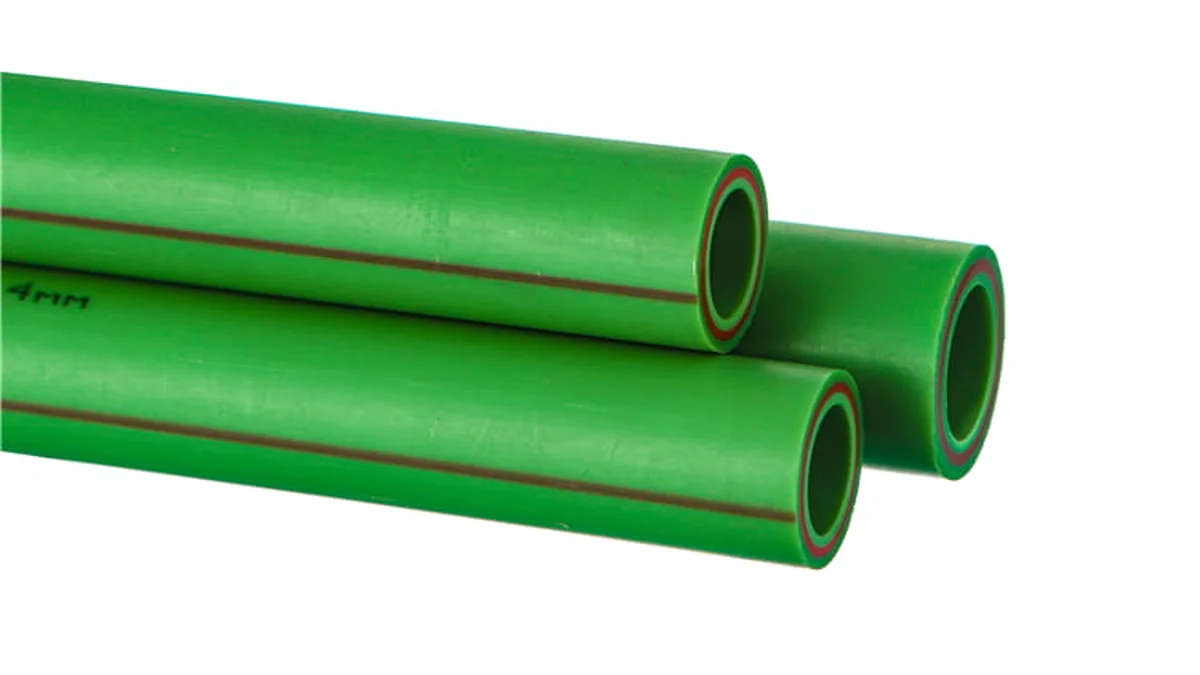
- Fiber-composite PPR: the glass-fiber middle layer cuts thermal expansion by roughly 75%, down to about 0.03–0.05 mm per metre per °C. That same 4 m run heated 50°C then grows only 6–10 mm. For long exposed hot lines, composite pipe is the cleaner fix.
Cold-water lines move far less, so the rules relax. The point is to design for the hottest condition the pipe will actually see, not the temperature in the room on install day.
Common PPR Installation Mistakes
Nearly every leaking PPR joint traces back to one of four errors at the fusion moment. None of them looks obviously wrong from the outside, which is exactly why they slip through. Here is what goes wrong and what it costs.
Cold joint from under-heating
If the die is below temperature or you pull off too early, only the very surface softens and the layer underneath never melts. The joint looks perfect and even holds during a quick check, then weeps or blows out once it sees hot water and pressure. Let the tool fully reach 260°C before the first joint, and heat for the full time on the chart — do not eyeball it short.
Bore collapse from over-heating
Leaving the pipe on the die too long melts too much material. When you push it in, the softened wall folds inward and a ring of melted plastic collapses into the bore, choking flow at every fitting. On a full system that shows up as weak pressure with no visible leak. If you smell scorched plastic or see the pipe end sagging, throw that piece away and start over — you cannot un-melt it.
Twisting the joint on assembly
Screwing or twisting the pipe into the fitting feels like it seats better. It does the opposite. The melt is aligned along the push direction; rotating it drags and tears that molten layer instead of fusing it face to face, leaving a spiral weak line. Push straight in, hold straight, done.
Moving the joint before it cools
Bending, hanging or pressurising a joint while it is still soft distorts the weld before it sets. Fusion is only as good as the cool-down. Leave each joint undisturbed for its full cooling time, resist the urge to rush a run, and never quench with water. Patience here is free; a re-do inside a wall is not.
Pressure-Test Before You Close the Walls
Never bury a PPR system before it passes a pressure test. Once every joint has fully cooled, cap the run, fill it with water to purge air, and pressurise it above the working pressure for a set hold period to prove the joints. A cold joint or a hairline weak spot will reveal itself now, while it is cheap to cut out and re-fuse. Test pressure, medium and hold time depend on the pipe class and local rules — confirm current requirements with the project engineer or the relevant authority for your market.
Watch the gauge and every joint through the whole hold. A steady pressure and dry joints mean you can close the wall or floor with confidence. Any drop means find the weeping joint first. Finding a leak now costs a fitting; finding it after tiling costs the wall. This last step is the one professionals never skip, and it protects the 50-year design life the fusion method is capable of.
Conclusión
Good PPR installation is mostly discipline, not skill. Cut square, mark the depth, heat to 260°C for the right time, push straight without twisting, hold, and let it cool all the way. Design for expansion on hot runs and pressure-test before you close anything. Get those steps right and the joint is a permanent part of the pipe.
The other half of a leak-free system is the pipe and fittings themselves — real wall thickness, virgin resin and consistent dimensions fuse predictably, batch after batch. If you source PPR to resell or install, the IFANULTRA team can share specs, certificates and a full catalog.
Related PPR Installation Guides
Frequently Asked Questions
What temperature do you weld PPR pipe at?
PPR socket fusion is done at about 260°C. The temperature stays the same across all diameters; only the heating and cooling time changes with pipe size. Let the tool fully reach temperature before the first joint.
How long do you heat PPR pipe before joining?
Typical heating time runs from about 5 seconds at DN20 to about 24 seconds at DN63 — longer for bigger pipe. These are approximate; always follow the chart on your fusion tool and adjust for ambient temperature.
Why should you never twist a PPR joint together?
The melted layer is aligned along the push direction. Twisting the pipe into the fitting shears and smears that molten material instead of fusing it face to face, creating a weak spiral seam that can leak under pressure. Push straight in.
How much does PPR pipe expand when hot?
Plain PPR expands about 0.15 mm per metre per °C. A 4-metre run heated 50°C grows roughly 30 mm. Fiber-composite PPR cuts that by about 75%, so plan expansion loops or use composite pipe on long hot runs.
Should you pressure-test PPR before closing the wall?
Yes. Always pressure-test the run after joints have cooled and before burying it. A cold joint or weak weld shows up now, while it is cheap to re-fuse. Confirm test pressure and hold time with your engineer or local authority.
Written by the IFANULTRA team — a PPR pipe and fittings brand of IFAN Group, drawing on 30+ years of manufacturing experience, German automated production lines, and ISO 9001, SKZ and NSF certified PPR product lines.


 English
 Español
 Français
 Português do Brasil