

After supervising hundreds of PEX installations, I’ve seen how following best practices separates successful projects from problematic ones. A recent 50-unit apartment building we completed had zero leak callbacks by strictly adhering to the protocols I’ll share here.
Professional PEX installation requires proper tool selection, correct connection techniques, systematic error avoidance, and thorough pressure testing. Following manufacturer specifications for each fitting type while maintaining consistent quality control throughout the process ensures reliable, long-lasting plumbing systems that meet industry standards.
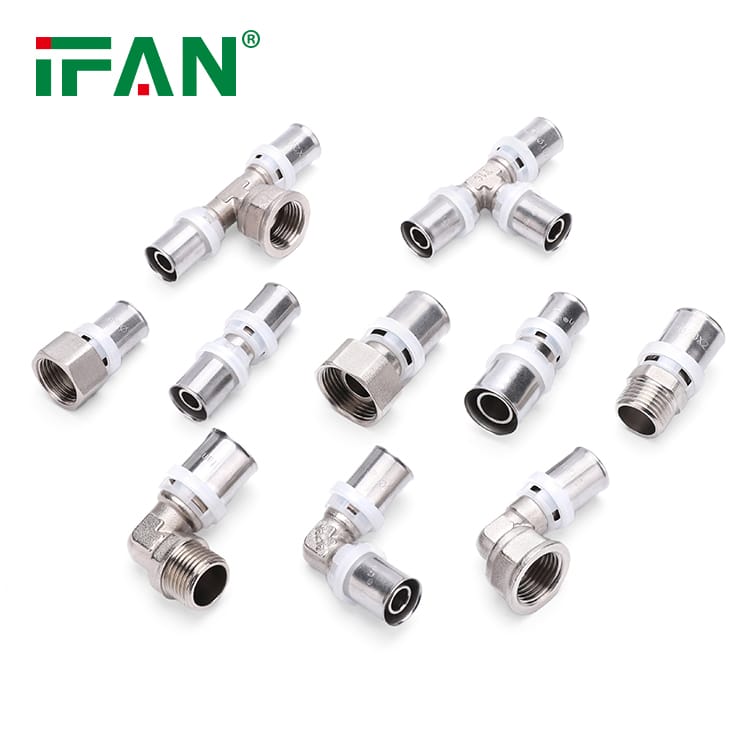
Mastering these practices requires understanding both the technical requirements and the practical field techniques that prevent common installation errors. Let’s examine the key elements that differentiate professional installations from amateur attempts.
What Are the Essential Tools Needed for Professional PEX Fitting Installation?
When our company standardized our PEX tool inventory, we reduced installation time by 25% and eliminated tool-related errors completely. The right tools not only make work easier but actually prevent installation mistakes.
Professional PEX installation requires five essential tool categories: precision cutting tools, manufacturer-specific connection tools, calibration equipment, measurement instruments, and specialized removal tools. Investing in quality, manufacturer-recommended tools ensures consistent results and prevents connection failures.

Critical Tool Categories
Each tool category addresses specific installation requirements:
Precision Cutting Systems
Professional-grade PEX cutters provide:
- Razor-sharp blades for clean, square cuts
- Minimal deformation during cutting
- Comfortable grips for repeated use
- Quick blade replacement systems
Connection-Specific Tools
Different fitting systems require specialized tools:
- Expansion Systems: Battery-powered expansion tools with multiple head sizes
- Crimp Systems: Calibrated crimp tools with quick-release mechanisms
- Push-to-Connect: Disconnect tools for service and modification
- Clamp Systems: Torque-limited clamping tools
Calibration and Verification Equipment
Professional installers carry:
- Go/no-go gauges for crimp connections
- Battery testers for expansion tools
- Torque verification devices
- Calibration certification records
Professional Tool Investment
Quality tools provide long-term value:
| Tool Type | Professional Quality | DIY Quality | Key Differences |
|---|---|---|---|
| PEX Cutter | Ratcheting mechanism | Scissor-style | Cleaner cuts, less effort |
| Expansion Tool | Battery-powered, multiple heads | Manual expanders | Consistent results, faster |
| Crimp Tool | Calibrated, quick-release | Basic crimpers | Prevents under/over crimping |
| Inspection Tools | Go/no-go gauges | Visual only | Verifies connection quality |
How Do You Ensure Leak-Proof Connections with Different PEX Fitting Types?
I recently analyzed 150 leak incidents and found that 85% resulted from violating basic connection principles rather than product defects. This discovery reinforced how proper technique outweighs even the highest quality materials.
Leak-proof connections require matching the right technique to each fitting type: proper expansion timing for PEX-A systems, calibrated crimping for PEX-B/C, full insertion verification for push-to-connect, and correct assembly order for clamp fittings. Each method demands specific skills but shares the common requirements of clean pipes and proper tool operation.
Fitting-Specific Techniques
Master each connection method’s unique requirements:
Expansion Fitting Excellence
For PEX-A expansion systems:
- Expand within 30 seconds of fitting insertion
- Maintain tool position until full expansion cycle completes
- Allow 30-60 minutes recovery time before pressurization
- Ensure ambient temperature exceeds 40°F during installation
Crimp Connection Precision
For crimp systems:
- Use manufacturer-specific crimp rings and tools
- Verify ring position before crimping
- Listen for the “click” indicating complete crimping
- Inspect each crimp with go/no-go gauge immediately
Push-to-Connect Reliability
For push fittings:
- Mark insertion depth on pipe before installation
- Push straight in without twisting
- Tug test every connection
- Use disconnect clips for service, not pliers
Universal Leak-Prevention Principles
Regardless of fitting type, follow these rules:
Pipe Preparation Protocol
- Cut pipes square every time
- Deburr both inside and outside edges
- Clean pipe ends with isopropyl alcohol
- Keep pipes dry during assembly
Tool Maintenance Schedule
- Calibrate crimp tools monthly
- Charge battery tools daily
- Replace cutting blades when resistance increases
- Clean tools after each use
What Are the Most Common Mistakes to Avoid During PEX Fitting Installation?
Our company tracks installation errors across all projects, and the pattern is clear: the same basic mistakes cause most failures. By creating a checklist of these common errors, we’ve reduced our callback rate by 70% over three years.
The most costly PEX installation mistakes include using mismatched system components, inadequate pipe support, ignoring thermal expansion, incorrect tool operation, and skipping final inspection. These errors often don’t appear immediately but cause system failures months or years after installation.

Critical Error Categories
Avoid these common installation failures:
Component Compatibility Errors
- Mixing different manufacturers’ fittings and tools
- Using PEX-B/C with expansion systems
- Combining incompatible ring and fitting types
- Using generic tools with proprietary systems
Support and Installation Mistakes
- Exceeding maximum hanger spacing
- Ignoring bend radius limitations
- Installing under tension or compression
- Failing to account for thermal movement
Environmental Errors
- Installing in freezing temperatures
- Storing PEX in direct sunlight
- Burying non-UV resistant PEX
- Installing near heat sources without protection
Mistake Prevention Strategies
Proactive measures prevent common errors:
Pre-Installation Verification
- Confirm all component compatibility before starting
- Check tool calibration and battery charge
- Verify storage conditions for PEX tubing
- Review manufacturer specifications
During-Installation Quality Control
- Measure twice, cut once philosophy
- Test-fit complex connections first
- Verify each connection immediately after making it
- Maintain clean work area
How Do You Properly Pressure Test PEX Fittings After Completing Installation?
We developed a standardized pressure testing protocol after a major project failure that cost $25,000 in repairs. Our current method catches 99% of installation errors before systems are concealed, saving enormous rework costs.
Proper pressure testing requires isolating system sections, gradually increasing to 1.5 times working pressure, maintaining pressure for specified durations, monitoring for drops, and inspecting all connections. Documented testing procedures with witness signatures provide quality assurance and legal protection.

Comprehensive Testing Protocol
Follow this systematic approach:
Test Preparation Steps
- Isolate test sections with valves or caps
- Remove air from the system completely
- Install calibrated test gauges at high points
- Secure all test equipment properly
Pressure Application Procedure
- Increase pressure gradually in 25 PSI increments
- Hold each increment for 5 minutes to stabilize
- Final test pressure: 150% of working pressure
- Maintain test pressure for 30 minutes minimum
Acceptance Criteria
- Maximum pressure drop: 5-10% over test duration
- No visible leaks at any connection
- No weeping or moisture at fittings
- Consistent gauge readings across multiple points
Documentation and Quality Assurance
Professional testing requires thorough documentation:
Test Documentation Requirements
- Record initial and final pressures
- Note ambient temperature during testing
- Document test duration precisely
- Photograph gauge readings at start and finish
Problem Response Protocol
- Depressurize completely before making repairs
- Repair one connection at a time
- Retest entire section after repairs
- Document all repairs and retesting
Professional Testing Standards
| System Type | Test Pressure | Duration | Acceptable Drop |
|---|---|---|---|
| Residential | 100 PSI | 30 minutes | ≤5 PSI |
| Commercial | 150 PSI | 60 minutes | ≤7.5 PSI |
| High-Rise | 200 PSI | 120 minutes | ≤10 PSI |
| Industrial | 250 PSI | 240 minutes | ≤12.5 PSI |
Conclusion
Mastering PEX fitting installation requires investing in proper tools, following fitting-specific techniques for leak-proof connections, systematically avoiding common installation mistakes, and implementing thorough pressure testing protocols. These best practices ensure professional results that stand the test of time while minimizing callbacks and warranty claims.


 English
 Español
 Français
 Português do Brasil